
Everyone has a junk drawer stuffed with who-knows-what. Some studies show the average person spends over 150 hours a year searching for lost items, often buried beneath piles of random clutter. Now here is what might surprise you. The real fix is not about buying fancy organizers or watching endless decluttering videos. This all comes down to a few brutally simple steps that will finally let you take back that drawer—and save your time and sanity.
Table of Contents
- Step 1: Clear Out All Contents From Your Junk Drawer
- Step 2: Sort Items Into Keep, Discard, And Donate Piles
- Step 3: Clean And Prepare The Drawer For Reorganization
- Step 4: Choose And Implement Storage Solutions
- Step 5: Organize Remaining Items Based On Frequency Of Use
- Step 6: Verify And Adjust For Long-Term Maintenance
Quick Summary
| Key Point | Explanation |
|---|---|
| 1. Clear everything from your drawer | Empty the drawer completely to understand what you have and create a fresh slate for organization. |
| 2. Sort items into three piles | Divide contents into keep, discard, and donate to streamline and clarify what stays in the drawer. |
| 3. Clean the drawer thoroughly | Use gentle cleaners to remove dust and debris, ensuring a clean foundation for reorganization. |
| 4. Choose suitable storage solutions | Select organizers that fit your items perfectly, enhancing ease of access and maximizing drawer space. |
| 5. Regularly review and adjust organization | Schedule quarterly checks to maintain organization and adapt the system to your changing needs. |
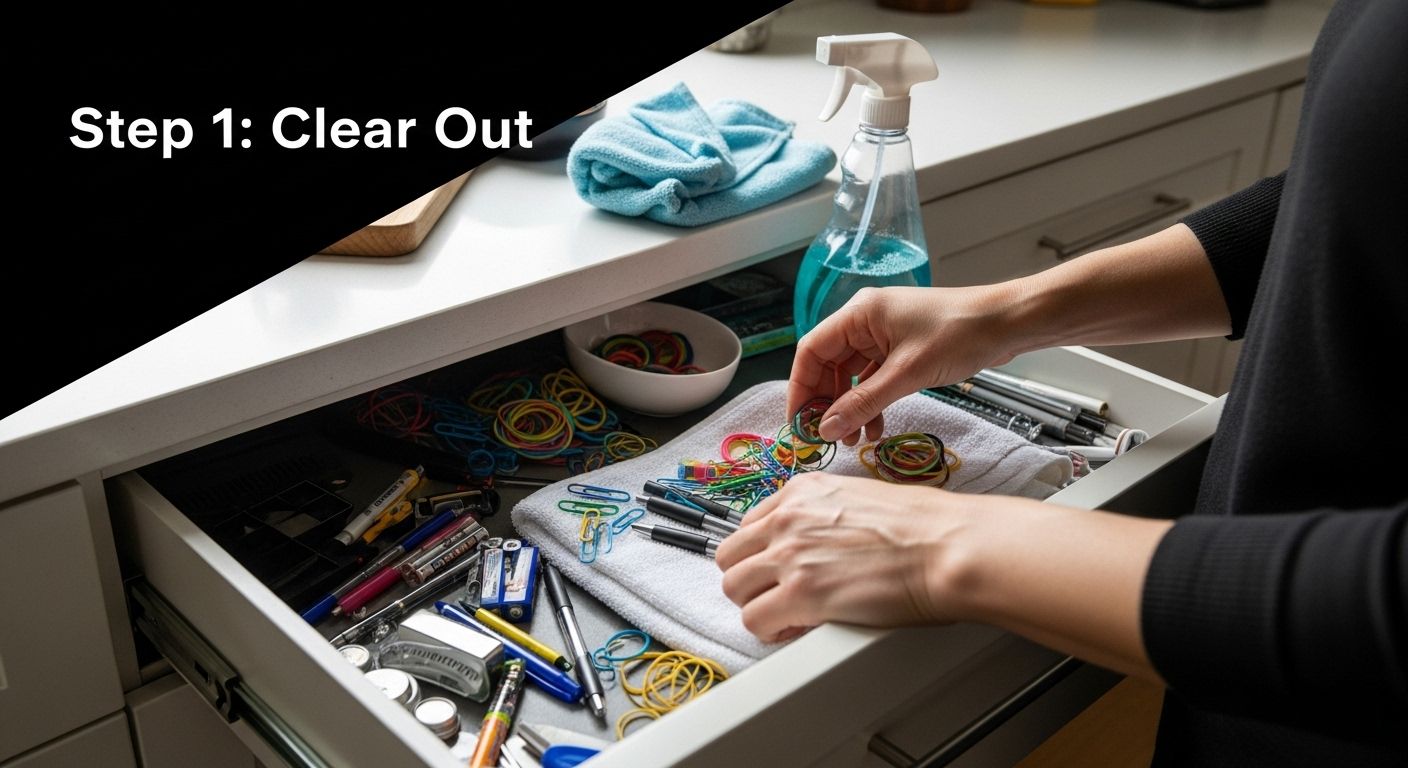
Step 1: Clear Out All Contents from Your Junk Drawer
Clearing out your junk drawer marks the crucial first step in transforming a chaotic storage space into an organized system. This initial process sets the foundation for effective junk drawer organization and helps you understand exactly what items you have been accumulating. By completely emptying the drawer, you create a blank canvas that allows for strategic reimagining of your storage approach.
Start by selecting a clean, spacious workspace like your kitchen table or countertop. Remove everything from the drawer methodically, placing items directly onto the surface. Pro tip: Use a large, clean towel or tray to contain smaller objects and prevent them from rolling away. As you pull out each item, resist the urge to sort immediately. Your goal is total extraction.
Once the drawer is empty, take a moment to inspect its interior. Check for any loose debris, dust, or minor damage that might need attention. Wipe down the drawer’s surfaces using a gentle cleaning cloth and mild all-purpose cleaner. This not only prepares the space for reorganization but also provides an opportunity to assess the drawer’s condition and potential need for repairs or replacement.
As you examine the contents spread before you, begin a quick initial assessment. Create three distinct piles: items to keep, items to discard, and items that belong elsewhere in your home. Be ruthless in this sorting process. Ask yourself critical questions about each object: When was the last time I used this? Does this item serve a genuine purpose? Would I buy this again today?
If you find yourself struggling with decision fatigue, check out our comprehensive guide on decluttering strategies. By the end of this step, you should have a clear view of what truly belongs in this drawer and what has been unnecessarily occupying valuable space. The empty drawer now represents potential organization and intentional storage waiting to be implemented.
Here is a summary table of the key steps to organizing your junk drawer, including main actions and the primary focus for each phase.
| Step | Main Action | Primary Outcome |
|---|---|---|
| 1 | Clear out all contents | Empty and assess drawer contents |
| 2 | Sort into keep, discard, donate | Separate items for purpose-driven organization |
| 3 | Clean and prepare the drawer | Create a fresh foundation for organizing |
| 4 | Implement storage solutions | Maximize space with tailored organizers |
| 5 | Organize based on use frequency | Make daily items easily accessible |
| 6 | Verify and adjust system | Maintain long-term order and efficiency |
Step 2: Sort Items into Keep, Discard, and Donate Piles
Sorting items from your junk drawer is more than a simple organizational task it represents a strategic approach to reclaiming valuable space and reducing household clutter. This critical step transforms random accumulation into intentional storage, helping you distinguish between necessary items and unnecessary objects that consume precious drawer real estate.
Three essential sorting piles will guide your decluttering process: keep, discard, and donate. Begin by establishing clear guidelines for each category. The “keep” pile should exclusively contain items you use regularly and have a specific purpose. Resist the temptation to hold onto objects out of sentimental attachment or potential future use. Ask yourself hard questions: When was the last time I used this? Does this item solve a current problem? Would I purchase this again today?
For the discard pile, focus on items that are broken, expired, or genuinely useless. Examine objects critically check batteries for corrosion, examine plastic items for cracks, and review paper items for damage. If something is beyond repair or no longer functional, it belongs in this pile. Electronics, batteries, and certain materials might require special disposal methods, so research local recycling guidelines for responsible elimination.
Learn more about mindful decluttering strategies when deciding what to keep or let go. The donate pile becomes an opportunity to help others while clearing your space. Include items that are still in good condition but no longer serve your needs clean, functional objects like extra office supplies, kitchen gadgets, or duplicate tools can find new life with someone else. Local charities, schools, and community centers often welcome such donations.
By the end of this sorting process, you should have three distinct piles that represent a thoughtful approach to drawer organization.
The keep pile will be compact and purposeful, the discard pile will be ready for responsible disposal, and the donate pile will be prepared to benefit others. This methodical sorting sets the stage for reimagining your junk drawer as an efficient, streamlined storage solution.
Step 3: Clean and Prepare the Drawer for Reorganization
Cleaning and preparing your drawer represents a transformative moment in your organization journey. This step goes beyond simple surface wiping it creates a fresh foundation for intentional storage and signals a psychological reset in your approach to household management. A thoroughly cleaned drawer becomes more than just empty space it becomes a canvas for deliberate, functional design.
Begin by gathering essential cleaning supplies: a microfiber cloth, gentle all purpose cleaner, warm water, and paper towels. Avoid harsh chemicals that might damage the drawer’s interior surface. Spray your cleaning solution onto the cloth rather than directly into the drawer to control moisture and prevent potential wood or veneer damage. Wipe every surface methodically the bottom, sides, and interior corners where dust and small debris tend to accumulate. Pay special attention to grooves and edges where grime can hide.
To make cleanup easy and efficient, here is a table of recommended tools and materials, including their use and key tips for best results.
| Tool/Material | Purpose | Key Tip |
|---|---|---|
| Microfiber cloth | Wipe surfaces clean | Spray cleaner on cloth, not directly in drawer |
| All-purpose cleaner | Remove dust and debris | Use mild formulas to avoid damage |
| Warm water | Prep for tougher dirt | Combine with dish soap for sticky residue |
| Soft-bristled brush | Scrub stubborn spots | Use for grooves and tight corners |
| Paper towels | Absorb moisture | Dry surfaces thoroughly after cleaning |
| Dish soap | Cut through stickiness | Mix with warm water for problem areas |
If your drawer shows signs of more stubborn dirt or sticky residue, create a mild solution of warm water and gentle dish soap. Use a soft bristled brush or toothbrush to carefully scrub difficult areas without scratching the surface. For wooden drawers, ensure you dry the interior completely to prevent potential warping or mold growth. Pro tip: Use a clean, dry microfiber cloth to absorb any remaining moisture and create a pristine surface.
Explore our comprehensive drawer organization techniques to elevate your storage strategy. Once cleaned, allow the drawer to air dry completely for at least 30 minutes. This waiting period ensures no moisture remains and provides an opportunity to assess the drawer’s condition. Check for any minor repairs needed loose screws, small cracks, or worn edges that might require attention before reorganization.
By the end of this cleaning process, your drawer should feel fresh, smooth, and ready for strategic reorganization. The physical act of cleaning transforms your mindset from passive accumulation to active, intentional storage management. You are now prepared to introduce organizational tools and systems that will maintain this newfound clarity and purpose.
Step 4: Choose and Implement Storage Solutions
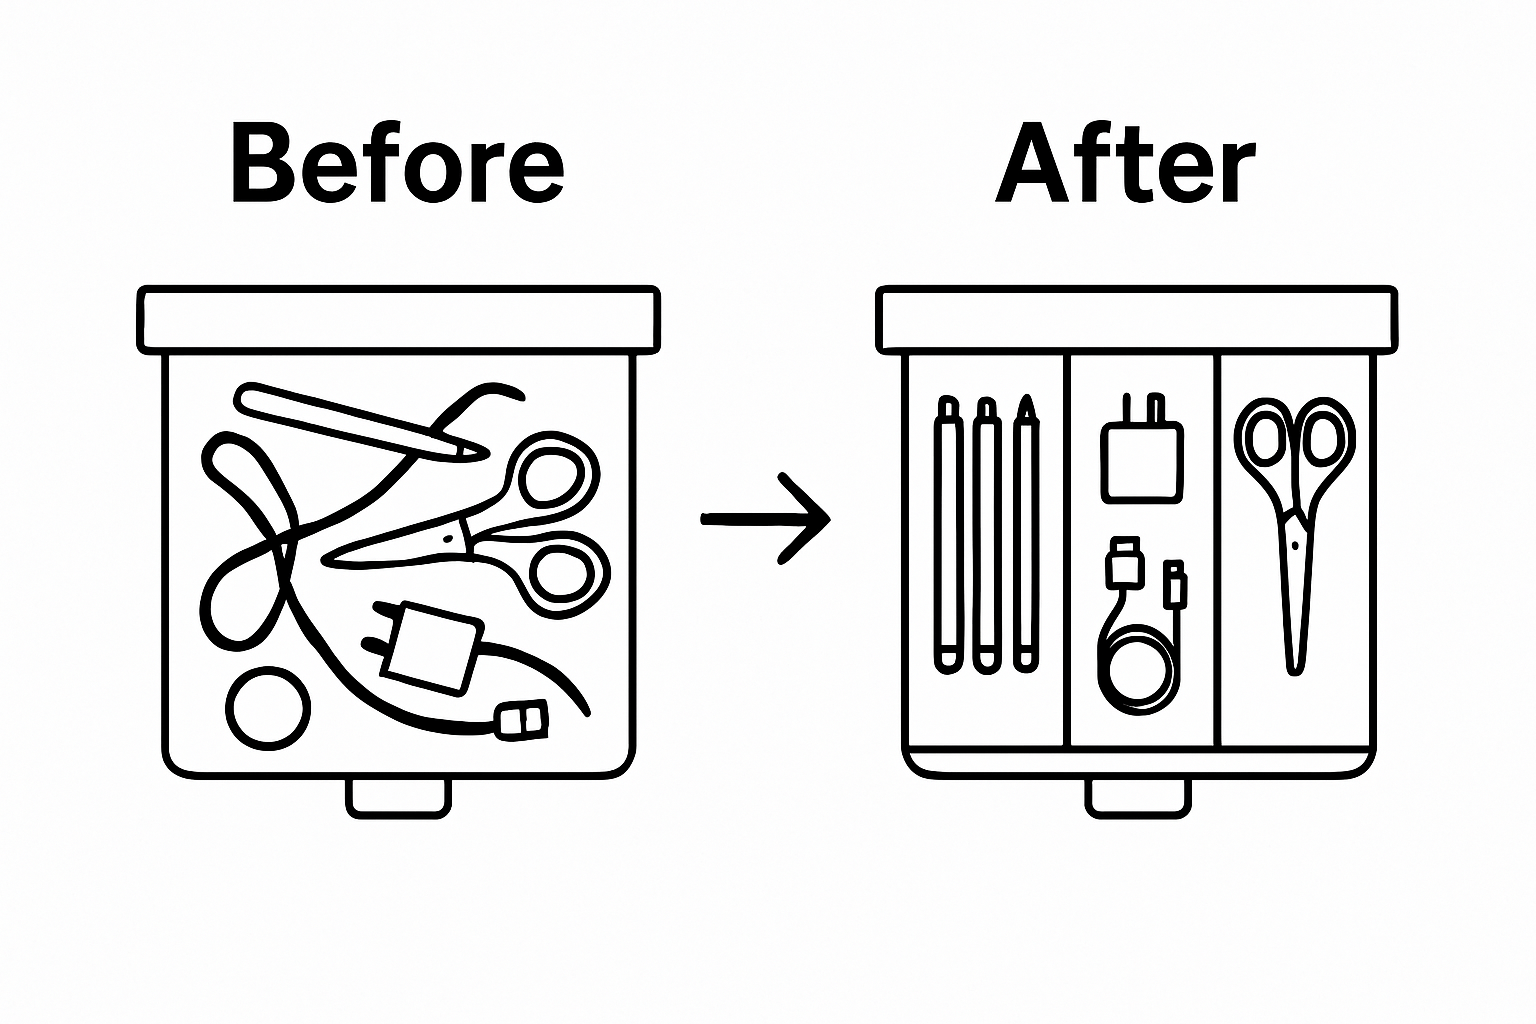
Choosing the right storage solutions transforms your junk drawer from a chaotic catchall into a precisely organized space. This step requires strategic thinking and a thoughtful approach to selecting organizational tools that match your specific needs. The goal is not just to contain items but to create a system that makes retrieval and storage intuitive and effortless.
Start by measuring your drawer’s interior dimensions carefully. Drawer dividers and organizers must fit precisely to maximize space efficiency. Consider modular storage solutions that can be adjusted or rearranged as your needs change. Plastic, bamboo, or metal dividers work well for creating dedicated zones within the drawer. Each compartment should be sized to accommodate specific types of items like writing tools, electronic accessories, or kitchen gadgets.
Pro tip: Select dividers with non slip surfaces or rubber feet to prevent sliding and maintain organization even when the drawer opens and closes. Look for containers with varying compartment sizes that can accommodate both small items like paperclips and larger objects like scissors or charging cables. Measure your most frequently used items to ensure each storage solution provides exactly the right amount of space. Avoid overfilling compartments this defeats the purpose of organized storage and creates visual clutter.
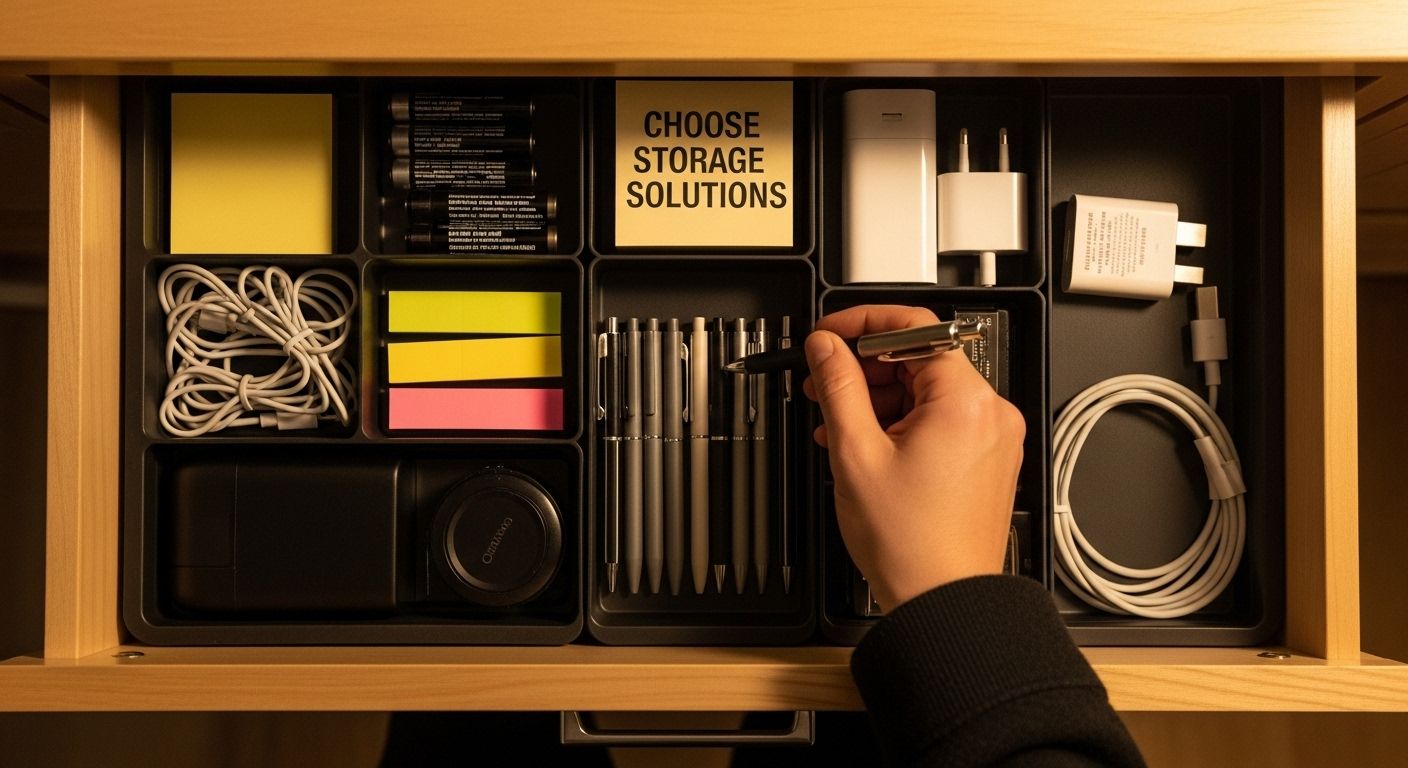
Discover innovative drawer organization strategies that can revolutionize your storage approach. When implementing your chosen solutions, place frequently used items in easily accessible compartments. Group similar items together think electronics, office supplies, or kitchen tools. Consider using clear containers or labels to quickly identify contents without rummaging. This approach not only looks neat but also saves time and reduces frustration when searching for specific items.
By the end of this step, your drawer should feel like a well orchestrated system where every item has a designated home. The right storage solutions will make maintaining organization feel natural and effortless, turning what was once a dreaded junk drawer into a model of efficiency and purpose.
Step 5: Organize Remaining Items Based on Frequency of Use
Organizing your items based on usage frequency transforms your junk drawer from a random storage space into a strategically designed system that enhances daily efficiency. This approach ensures that the most frequently used items are always within immediate reach, while less essential objects are stored more discreetly. Think of your drawer as a personal productivity zone where every item has a calculated position based on its importance and how often you interact with it.
Begin by creating three distinct zones within your drawer: prime access, secondary access, and occasional access. The prime access zone represents the front or most easily reachable section of the drawer. Here, place items you use daily like pens, notepads, charging cables, or frequently used tools. These should be positioned so you can grab them with minimal effort, practically without looking. The secondary access zone sits slightly behind the prime zone and contains items used weekly such as specialty tools, extra batteries, or miscellaneous office supplies that you need regularly but not constantly.
Pro tip: Use color coded or translucent organizers to create visual cues that help you quickly identify each zone. The occasional access zone towards the back of the drawer will house items used monthly or seasonally like instruction manuals, rarely used adapters, or backup supplies. This strategic placement prevents these less frequent items from cluttering your primary workspace. Learn more about creating efficient storage systems that adapt to your lifestyle and needs.
Consider the ergonomics of your drawer when placing items. Right handed individuals might want frequently used objects positioned slightly to the right, while left handed people might prefer a reversed arrangement. Pay attention to weight distribution ensure heavier items are placed at the bottom to prevent smaller objects from being crushed or hidden. By the end of this organization process, your drawer should feel intuitive your hand should naturally gravitate to the right item at the right moment, transforming what was once a chaotic space into a perfectly personalized storage solution.
Step 6: Verify and Adjust for Long-Term Maintenance
Long term junk drawer organization requires more than initial setup it demands consistent evaluation and strategic adjustments. Maintenance is not a one time event but an ongoing process of refinement and adaptation. Think of your newly organized drawer as a living system that will naturally evolve with your changing lifestyle and needs.
Schedule a quarterly review of your drawer to assess its current organizational effectiveness. During these check ins, empty the drawer completely and critically examine each item as if you were seeing it for the first time. Ask yourself challenging questions: Have my usage patterns changed? Are these items still relevant to my daily life? Do the current storage solutions continue to serve their intended purpose? Be prepared to ruthlessly eliminate items that no longer add value or have become obsolete. This periodic reset prevents gradual accumulation and ensures your drawer remains a functional storage solution rather than sliding back into chaos.
Explore advanced organization maintenance techniques that can help you stay ahead of clutter. Pay attention to wear and tear on your storage solutions. Drawer dividers, containers, and organizational tools are not permanent fixtures. Replace them proactively if they show signs of damage or no longer fit your items perfectly. Consider seasonal adjustments some times of the year might require different organizational approaches based on changing needs like tax season, holiday preparations, or work project cycles.
Successful long term maintenance involves developing a personal organizational rhythm. Create a simple tracking method perhaps a small note in your calendar or a digital reminder that prompts you to review and refresh your drawer. By treating organization as an ongoing practice rather than a completed task, you transform your junk drawer from a static storage space into a dynamic, responsive system that continually adapts to your life. The ultimate goal is not perfect organization but a practical, flexible approach that reduces stress and increases your daily efficiency.
Tired of Junk Drawer Chaos? Transform Your Space with Smart Storage Solutions
Are you frustrated by a cluttered junk drawer that never seems to stay organized? After following the simple steps in this article, you already know how quickly a messy catchall can steal valuable time and create daily stress. If you are determined to maintain a clutter-free and efficient home, now is the perfect moment to take your organization to the next level with quality products designed for your specific needs. Explore our Kitchen Storage options, where you can find sturdy dividers, containers, and baskets that bring order to every corner of your drawer. Say goodbye to rummaging and hello to easy access and calm, stylish storage.

Ready to see a real difference? Discover our full range of space-saving tools at https://blushbees.us. Choose what fits your lifestyle and put an end to clutter for good. Act now to turn your drawer into an organized highlight of your home. Create a system that works for you today—before old habits creep back in.
Frequently Asked Questions
How do I start organizing my junk drawer?
Begin by completely emptying the drawer and inspecting its contents. Create three piles: keep, discard, and donate. This initial step sets the foundation for effective organization.
What should I do with broken or expired items in my junk drawer?
Items that are broken, expired, or no longer useful should be placed in the discard pile. Ensure to follow local recycling guidelines for responsible disposal of electronics and batteries.
How can I select the right storage solutions for my junk drawer?
Start by measuring your drawer’s interior dimensions. Choose modular dividers and organizers that fit well and allow for easy access to frequently used items. Prioritize non-slip surfaces to prevent sliding.
How often should I maintain my organized junk drawer?
It’s advisable to schedule a quarterly review of your drawer to assess its organization. During this review, empty the drawer and decide if any items need to be removed or if the storage solutions still meet your needs.

